In 2022 I developed a knife sharpener for the Prepworks brand along with an industrial designer and a product manager.
There are a lot of ways to sharpen a knife so we started with research and testing existing products. There are endless articles and videos on the topic but few are rigorous. To be fair it’s hard to test knife sharpness quantitatively. No reliable source had tested the full range of knife sharpeners that we were interested in so did it ourselves. Broadly there are two formats of “pull though” knife sharpeners: V notch types and rolling types. Either type can use ceramic, tungsten carbide, or diamond coated metal for the sharpening bit. We tried tested these types. Motorized products and whetstones were out of scope.

I developed a methodology which was qualitative but was able to make comparisons. It used a microscope and the cutting of standard printer paper. Microscope images revealed this factory blade possessed a highly refined edge. Because the light source is right next to the camera lens, light reflection was limited to the edge, appearing as a bright white area. This minimal reflection corroborated the thinness of the original edge. After that, the edges were dulled using sandpaper. Post-dulling, an increase in edge thickness can be seen plainly. Subsequent sharpening using the various products on the market resulted in a reduction of thickness in the bright edge. After sharpening I also used the knife to cut paper by pinching the paper and cutting away from the pinch. Very sharp blades can cut paper with a simple push, no sawing motion. You can see the paper edge is very smooth, with minimal paper fibers visible. Moderately sharp blades can cut with a sawing motion. Dull blades cannot cut paper end up ripping. I also examined the edges from the side to see the scratch patterns and understand where material was being removed.


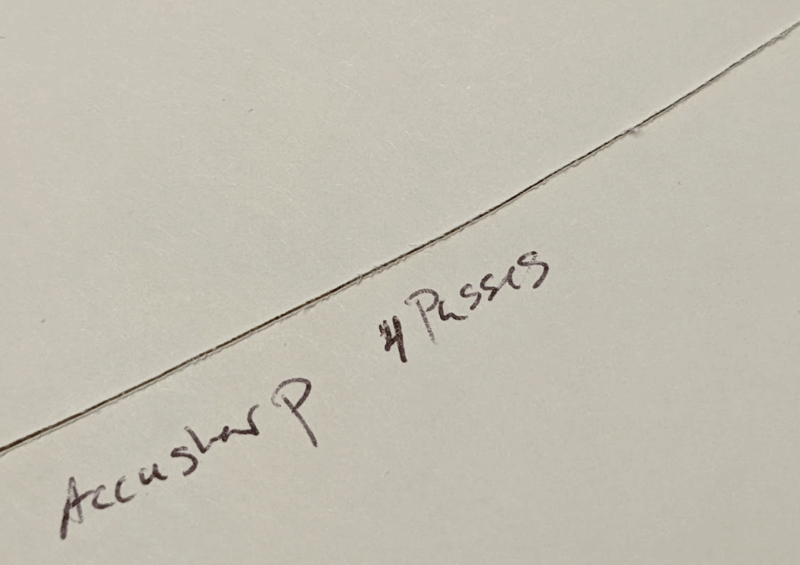

Around the time of this project a company released a standardized test method for knife sharpness testing. It’s simply an electronic scale with a jig that holds a standardized filament. You cut the filament with the knife. A lower force means a sharper knife. We obtained one of these apparatuses and used it to corroborate our findings. The downside of this method is that it only tests a single point of the edge, and it’s very time consuming to test a large enough number of samples to differentiate between methods. The old fashioned methods of using the pad of a thumb to feel the edge, dragging the edge on your fingernail, or using paper still have some use.

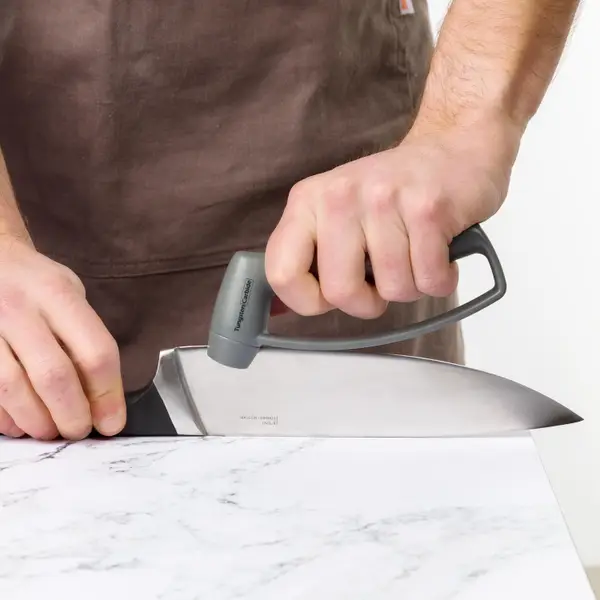
After all the testing we judged that, although factory sharpness levels were never fully restored by any product, they all could be considered good enough for most users. In practical terms, it meant a knife could cut a tomato under the weight of the knife alone, just pulling the knife back and forth. Sharpness itself was not an opportunity to differentiate. It became more about the speed and learning curve. Manual ceramic or diamond wheel format items took a very long time to work well – on the order of 50 to 100 strokes. V notch format items were much faster. Of those, the ones with tungsten carbide bits were the fastest by far, usually only taking a few strokes. I understand why some people don’t like this format though, because it can be overdone. If you push very hard at a bad angle, much more material than intended can be removed. Regardless, we settled on using a V-notch style format with a tungsten carbide bit because reviews for it are good, and reports of misuse by typical users were rare. The main competitor in this space was Accusharp whose product is shown here although there are many more.

Design

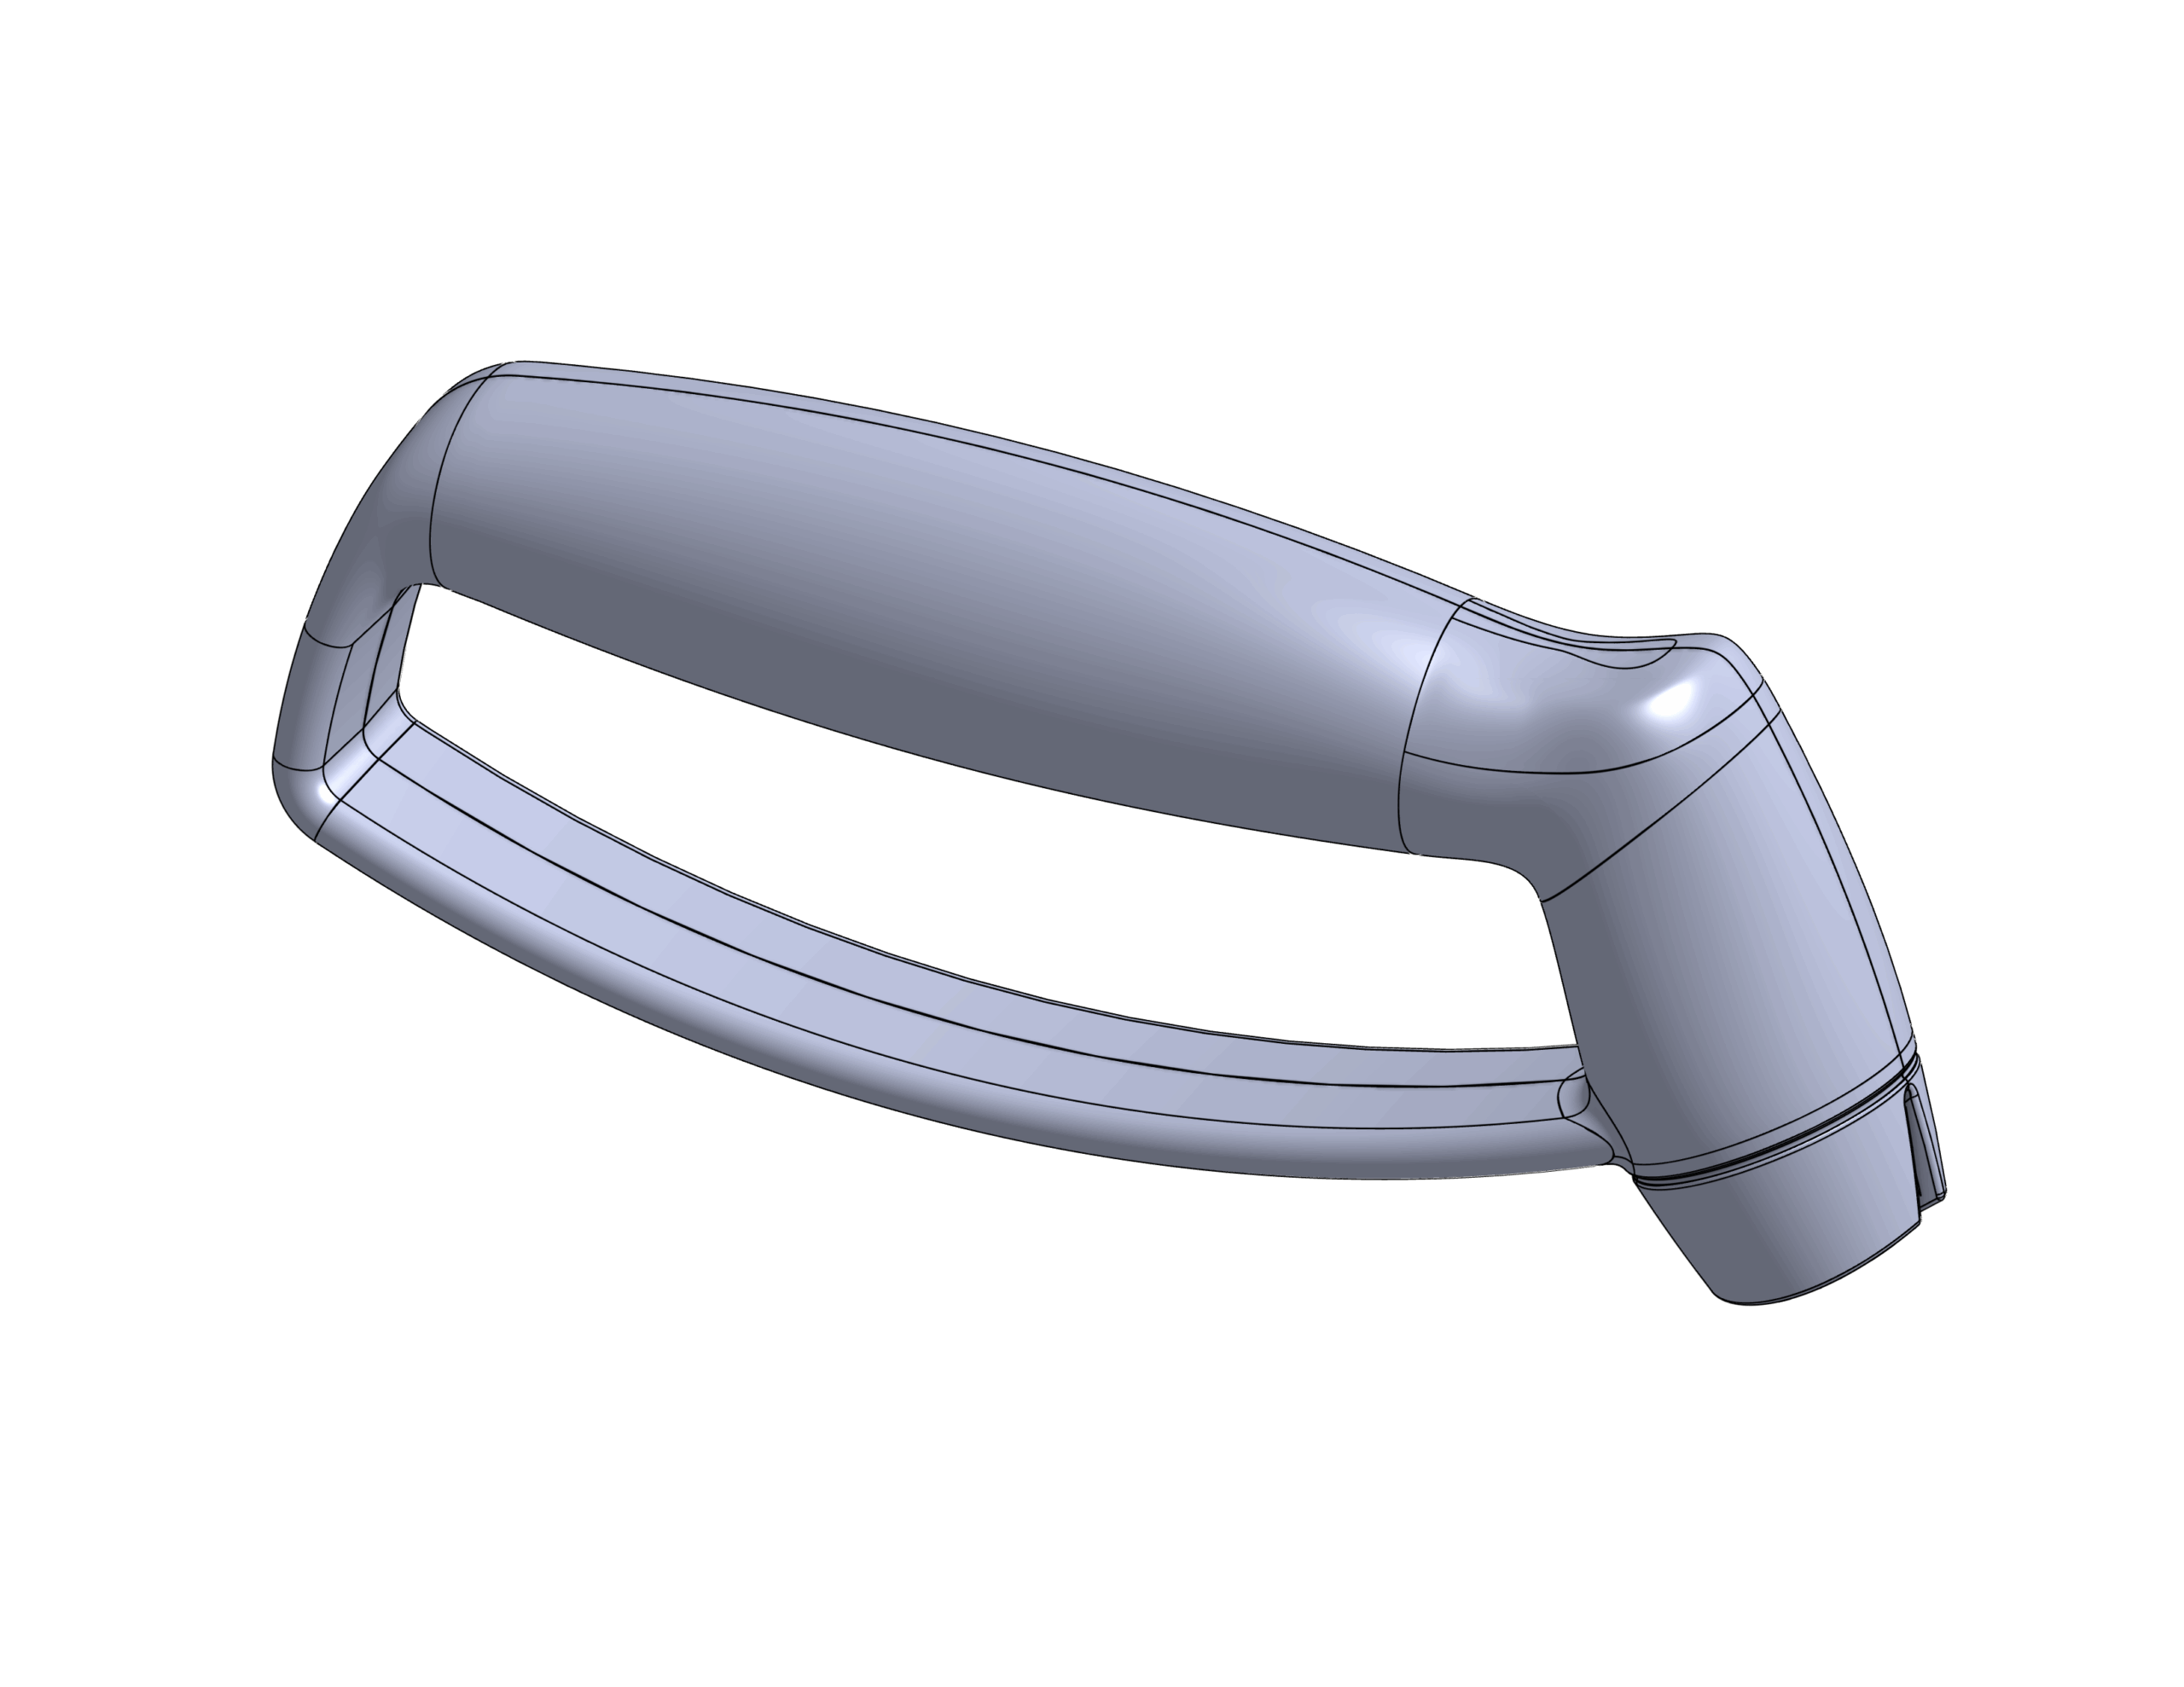
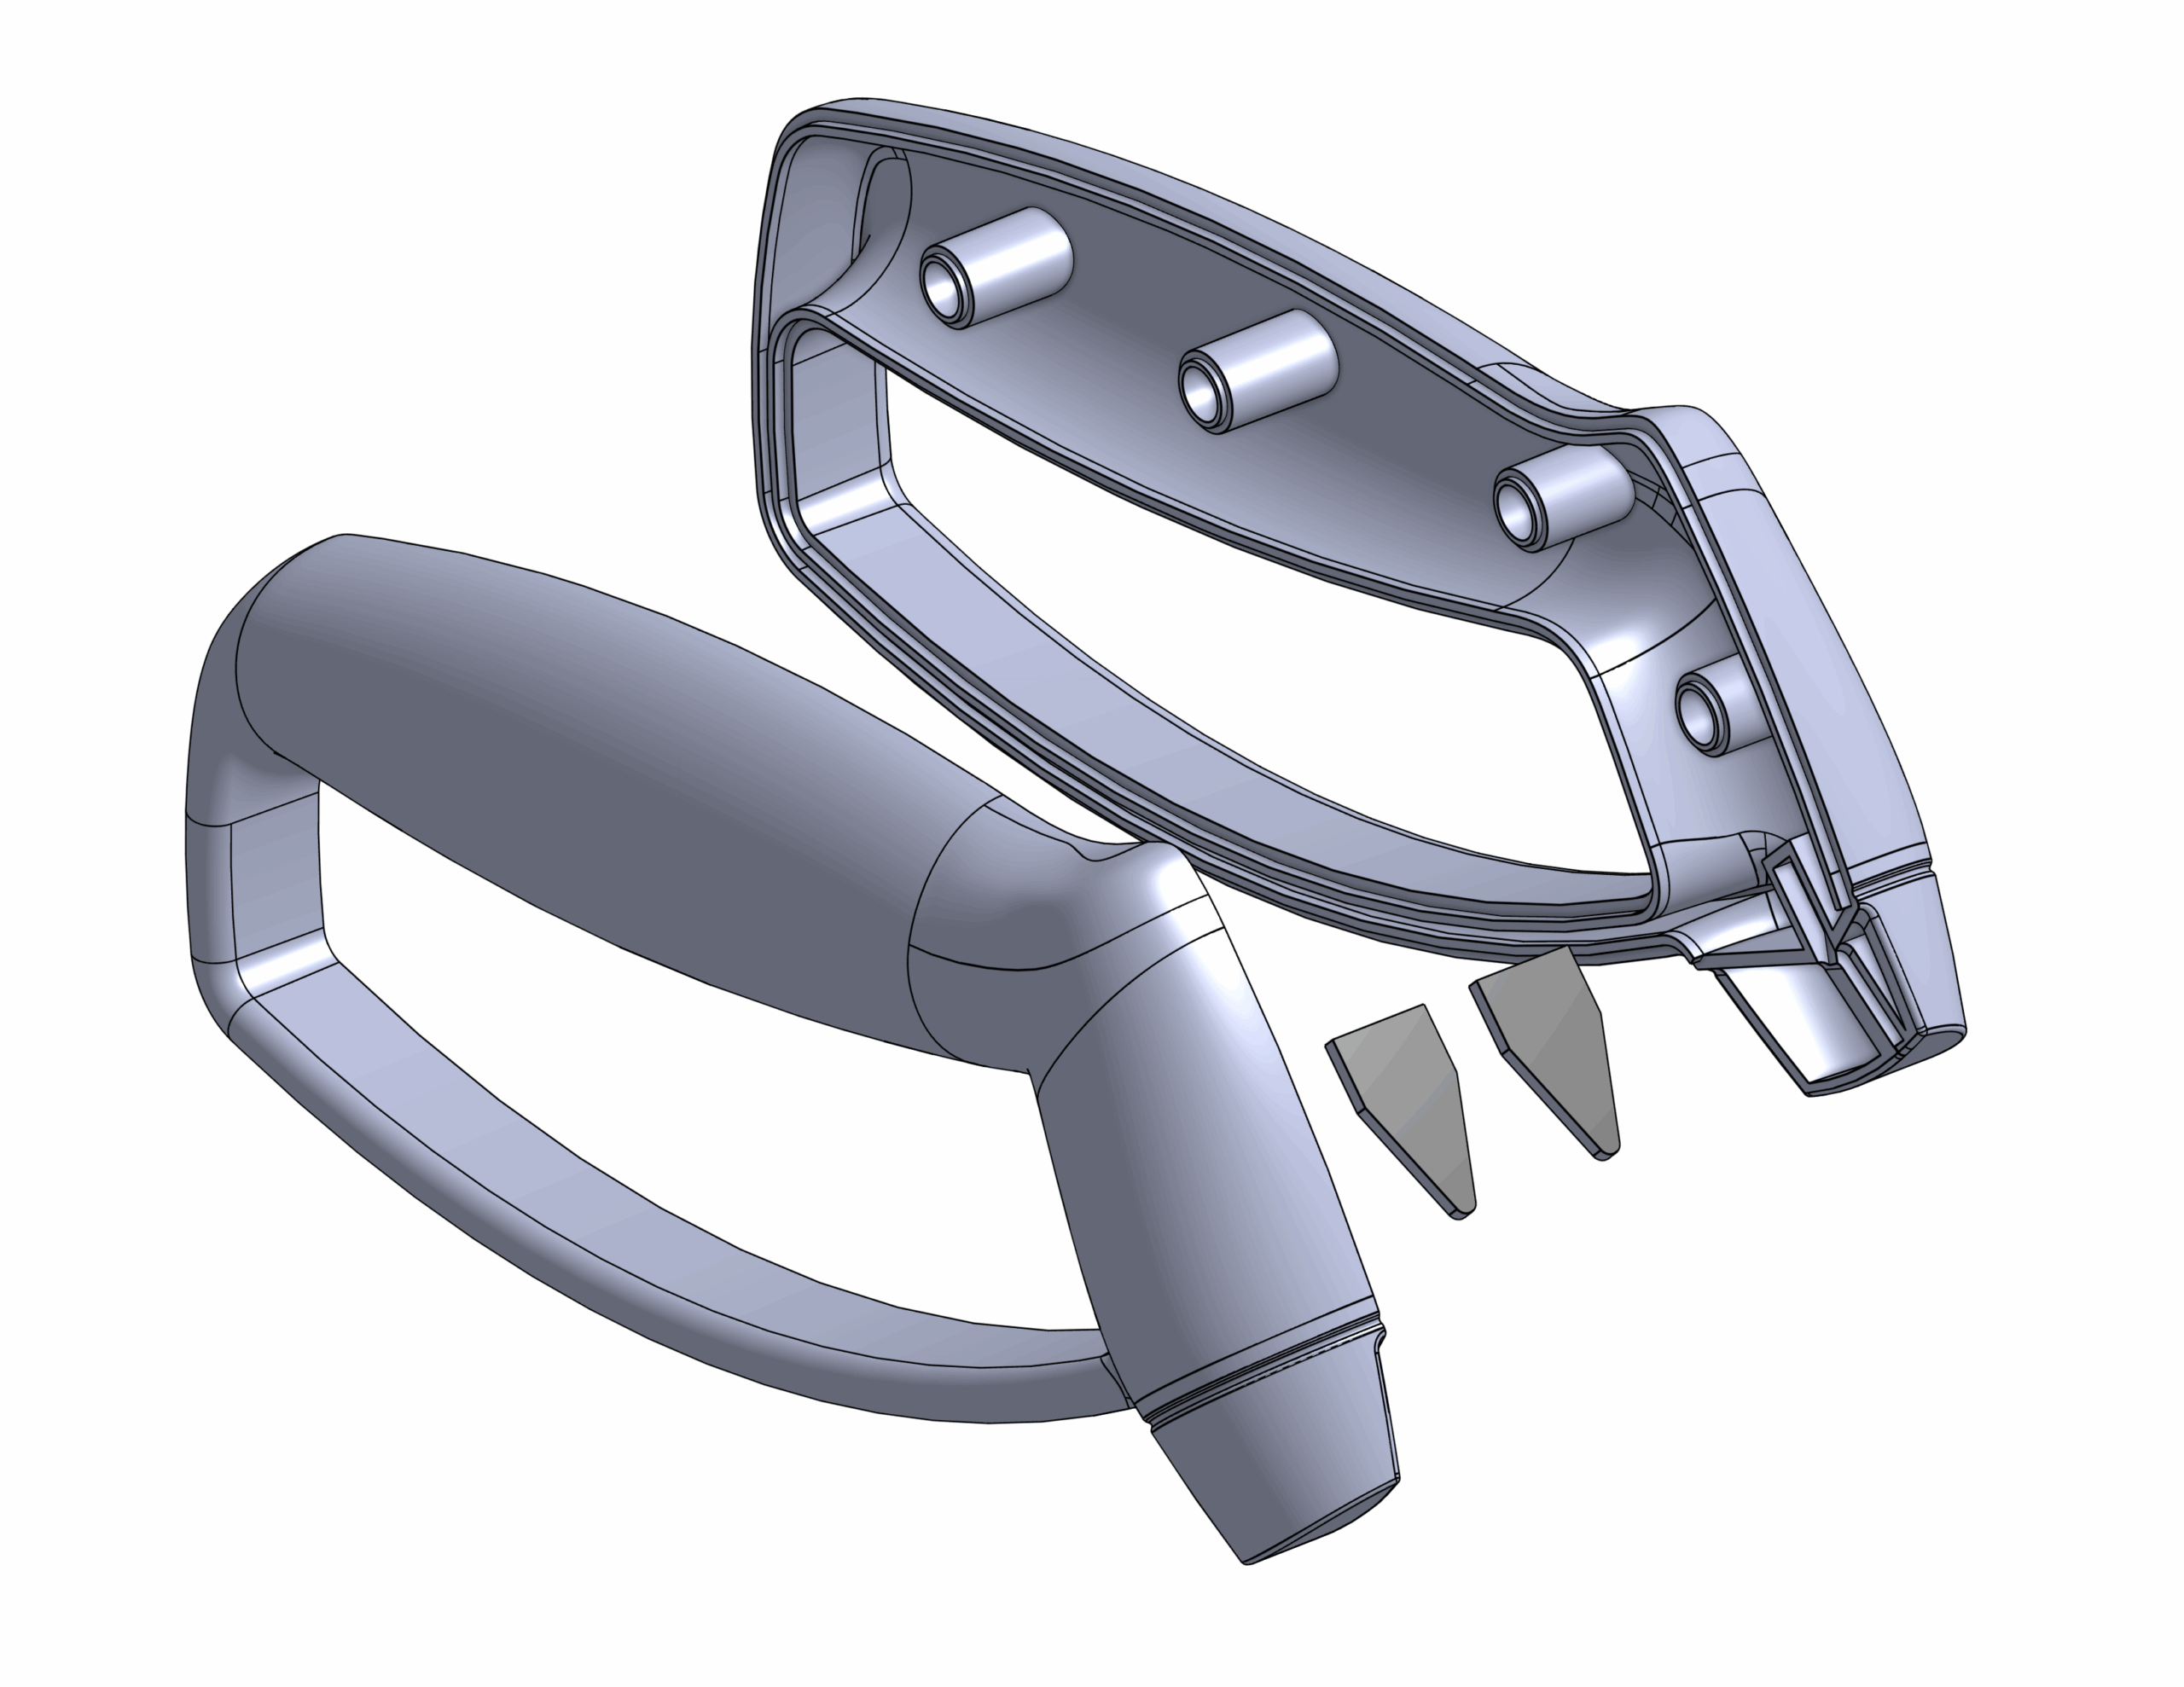
The Accusharp item works well so we focused on improving the aesthetics and feeling of safety. Our design is curvature continuous and very comfortable. Many iterations went into refining the shape and functionality. Some users like to put their thumb over the bit so we added a small flat area for that. We also added an integrated hand protector. The Acusharp’s hand protector is a bit flimsy and it feels cheap. The item is constructed out of ABS with a lip and groove US welded around the edge and no screws. It’s a standard construction method for housings but uncommon in kitchen gadgets. I did all the native CAD for this item.

I used the test method described earlier again to debug prototypes and off-tool samples. One interesting thing we found was the exact angle that the sharpening bits are set at was critical. Most western kitchen knives have a bevel angle of 20 ° but we found when a sharpener bit was set at 20°, any misalignment by the user would result in metal being removed around the shoulder of the bevel, not the very edge. The bevel angle was increased slightly by a degree. This proved to be sufficient such that users would naturally align it well enough. On the other hand, it also meant that it sharpens the item to a slightly worse angle and, eventually when the whole factory bevel has been removed, the sharpener won’t work as quickly anymore since it needs to remove more material across the whole bevel to sharpen the edge. This was a tradeoff we decided to accept and is a major reason that you can’t use the item to return the product to factory sharpness. Surveys showed the vast majority of people don’t sharpen their knives very often, if at all. Cycle testing demonstrated that it would take many years of typical use before that point was reached.
The Final Product
Compared to the competition this product works just as well as, is lower cost, feels more premium, and feels safer to use than the competition. This knife sharpener project reinforced the importance of thorough testing, iterative design, and attention to detail in mechanical engineering. Besides the challenges with the product itself it was also an excellent exercise in quality surface modeling.


